So today I started my healthy living diet, and ended up making a not so healthy walnut and coffee/vanilla cake. I couldn’t help it. As soon as that word diet slipped into my head my body basically became an obstructor to the salad drawer and tricked me into making a sponge.
This sponge, I’m a big fan of a rustic looking cake.

Sorry body, but I’m not sorry.
I thought, seeing as it was a big hit with my dad when he managed to get a piece that I’d put down the recipe for you to follow. Please bear in mind I’m not expert, in fact I’m pretty new to making cakes having always made cupcakes instead. This recipe is just what seems to work for me, as well as the oven temperature and baking time, but all appliances really vary so just watch out for that.
Ingredients for the Vanilla Sponge
I tend to make a vanilla sponge because I like to play it safe, and I’ve not got my perfect chocolate cake mix to perfection yet. This sponge goes really beautifully with the butter cream coffee icing and it always seems to end up spongey and moist. You will need:
– 220g of caster sugar
– 220g of butter (I really like Kerrygold Irish)
– 220g of plain flour
– tsp of baking powder
– 3 medium eggs
– 1- 2 tsp of vanilla extract
– 2 tbsp of milk (if you like a more crumbly cake add some more milk)
Method
It’s crazy really when you think about how easy it is to mix up the ingredients.
Preheat your oven to 160°C/325°F/Gas Mark 3
Cream the butter and sugar together until it looks and feels light and perhaps obviously a bit like cream. I love to use my grandmother’s tablespoon for this (I’m really big and doing the work by hand) but an electric whisk will get it done faster. I like to crack my eggs straight into the bowl and begin to mix this together. As the mixture begins to curdle I’ll add a tablespoon of flour and the baking powder in at a time. Eventually you’ll have added all the flour in and the mixture, I tend to find, is a bit tough to stir. Add the milk and vanilla and stir this all in until you have a uniformed and creamy luscious mess sitting in your bowl.
Butter up two tins of the same size, I like those silicone ones as the cakes tend to fall right out of them after cooking and split the mixture evenly into both. Once you’ve got your mixture split up, I swear by lifting up the tins and dropping them onto the tabletop to get the air pockets out of them. I’m not talking from a great height just a little lift and drop. Then pop them into the oven. Without fail my cakes are done after 20minutes, but I always check mine with a skewer, which will come out clean when the cakes are done. The cakes should be springy to touch (yum). Place them on a wire rack and leave to cool for 5-10 minutes before turning them out. I hate getting those lines from the wire racks so I place a tea towel on them before I turn out my cakes.
Let the cakes cool completely before you ice them.
Ingredients for the Coffee Butter Cream Icing
– 250g of butter
– Icing sugar (for me this is all about adding as I go)
– 1tbsp of coffee
– 1tsp of milk (optional)
Method
I definitely use an electric whisk for this bit, the cream becomes ten times more creamer and lighter with an electric then by hand. Cream the butter by itself first, to make sure it’s soft enough and then gently I repeat gently add the icing sugar a bit at a time. If you have a taste of your mixture you should not be able to taste too much butter but rather more sugar. I like to add the milk in at this point as I reckon it makes the mixture more creamy and yummy. Then add the coffee liquid, but remember to add this to flavour. It’s totally possible that as you add the liquid you will get some curdling so keep on adding that icing sugar.
Another optional WALNUT PIECES
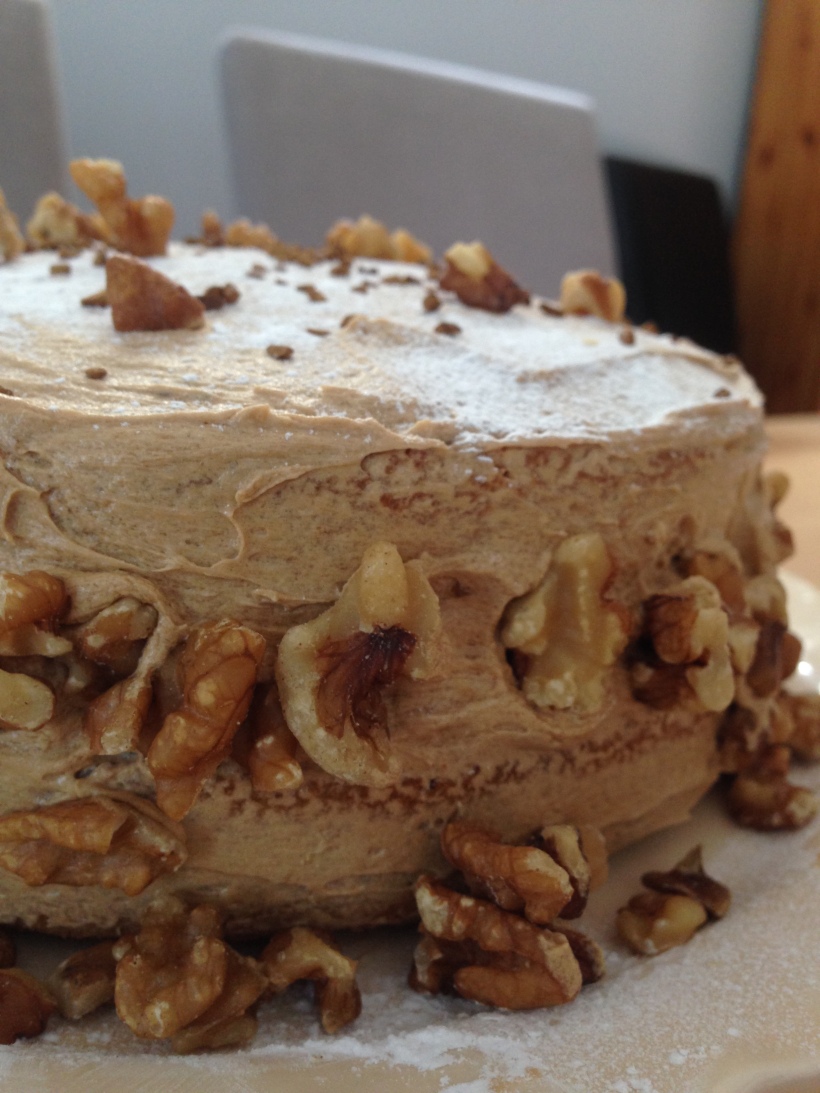
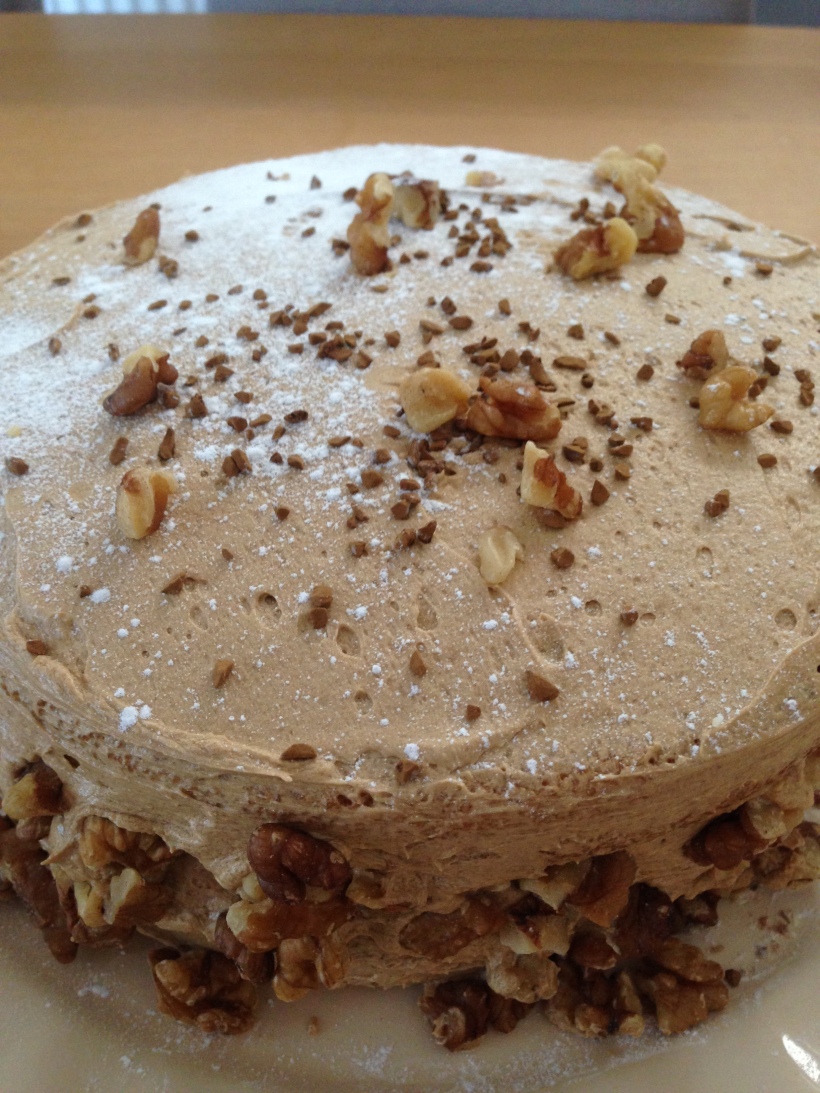
Now of course I mentioned walnuts in this cake and as you can see by the decoration I basically smothered the cake in them after I iced it.
But another secret for those who love lots of nutty bits is to add some into the middle buttercream before you sandwich your two cakes together. Firstly add a few heaps of coffee buttercream to one sponge, once you’ve got your layer drop in a bunch of walnuts spread evenly, then add a light layer of buttercream to the other cake and sandwich the two bits together. Simple.
I kept my decoration simple, but as I said before smothering the cake in walnut pieces and sieving some icing sugar over the top. I would definitely also add smashed chocolate bits to the top of this cake as well, but seeing as it was spur of the moment I didn’t have any on hand.
I seriously loved making this cake and although I know that I have to be good from now on I know it’s not the end of my cake making days. Watch this space.
